Install the CodeFusion Studio VS Code extension
You can install the CodeFusion Studio extension using one of the following methods. Once the extension is installed, Visual Studio Code will automatically upgrade it when a new version becomes available (unless automatic updates are disabled).
Option 1: Install from within VS Code (recommended)
- Open Visual Studio Code.
- Go to Extensions (or press
Ctrl+Shift+X/Cmd+Shift+X). -
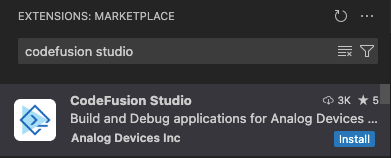
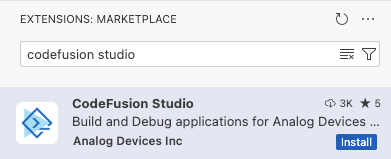
Search for "CodeFusion Studio".
-
Select the extension and click Install.
Option 2: Install from the Marketplace
You can also install the extension directly from the Visual Studio Code Marketplace:
CodeFusion Studio VS Code Extension
Click Install to open Visual Studio Code and complete the installation.

Verify installation
To confirm that the extension installed correctly:
- In VS Code, open Extensions (
Ctrl+Shift+X/Cmd+Shift+X). - Search for "CodeFusion Studio" again.
- The extension should appear in the Installed list.


Manually install the VS Code extension
If you are unable to install the extension directly from the Visual Studio Code Marketplace due to firewall restrictions or an offline environment, you can install it manually.
To manually install the extension, locate the CodeFusion Studio VS Code extension VSIX file in the VS Code directory within the CodeFusion Studio installer.
- Open Visual Studio Code.
- Select the Extensions icon from the activity bar.
- Click Views and More Actions (...) and select Install from VSIX.
- Navigate to the
<codefusion-sdk-install>/VSCodedirectory. The exact location depends on your installation path. The following are the default locations:- Linux:
/home/<username>/analog/cfs/<version>/VSCode - macOS:
/Users/<username>/analog/cfs/<version>/VSCode - Windows:
C:\analog\cfs\<version>\VSCode
- Linux:
- Select the
cfs-ide-*.vsixfile to install. - Restart VS Code for the changes to take effect.


Optional: Disable automatic extension updates
By default, Visual Studio Code will automatically update extensions as new versions become available. Each CFS extension version is specifically paired with a matching SDK version. If the extension updates automatically but the SDK does not, this can lead to unexpected behavior or compatibility issues. To avoid this, you may want to prevent VS Code from automatically updating the CFS extension.
To disable auto-update for this extension only:
- Open the Extensions panel in VS Code.
- Search for CodeFusion Studio and select it to open the details page.
- Under the extension title, clear the Auto Update checkbox.
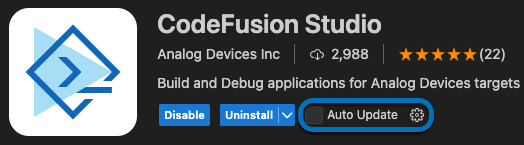

This allows you to keep using the extension version bundled with a specific CFS SDK.
Tip
If the CFS extension updated unexpectedly, disable automatic extension updates and install a specific version.
Install a specific version
You can install a specific version of the CodeFusion Studio extension or any of its dependent extensions (such as Zephelin Trace Viewer or Cortex-Debug) from the VS Code Extensions panel.
- Open Extensions (
Ctrl+Shift+X/Cmd+Shift+X) and search for the extension by name. - Select the extension to open the details page, then clear the Auto Update checkbox to prevent VS Code from overwriting your selection.
- Right-click the extension (or Ctrl+click on macOS) and select Install Specific Version.
- Select the version you want to install.
- Reload the VS Code window: open the Command Palette (
Ctrl+Shift+P/Cmd+Shift+P) and run Developer: Reload Window.
For the CFS extension, you can also install a specific version using Install from VSIX, as documented above.
Optional: Review dependent extensions
The CodeFusion Studio extension depends on other VS Code extensions (including Microsoft C/C++, Cortex-Debug, and Zephelin Trace Viewer) to provide debugging and development features.
In most cases, no additional action is required.
- First install of the CFS extension: Dependent extensions are installed automatically if missing.
- Dependencies already installed: Existing versions are kept unchanged.
- Upgrading the CFS extension: Dependent extension versions are not automatically updated.
To view all dependent extensions, open the Extensions panel, select CodeFusion Studio, and open the Dependencies tab.
If you encounter issues with a dependent extension, select Update if available, or install a specific version. See Install a specific version.
Next steps
To complete installation, check that your SDK and tool paths are set correctly.