CFS Terminal
CodeFusion Studio (CFS) provides a custom terminal called the CFS Terminal.
The CFS Terminal is the default terminal that opens when interacting with CodeFusion Studio and adds CodeFusion Studio tools to your PATH without any additional user configuration (for example, cfsutil and Zephyr's west). Most tasks available in the IDE (such as build, flash, and workspace management) have command-line equivalents in cfsutil that can be run from the CFS Terminal. See the CFS Command Line Utility documentation for more information.
The underlying shell depends on your host operating system:
cmdon Windowszshon Macbashon Linux
Launch new terminal
-
Open the terminal:
- On macOS/Linux, select Terminal > New Terminal.
- On Windows, select View > Terminal.
- Use the
Ctrl + Shift + `keyboard shortcut.
-
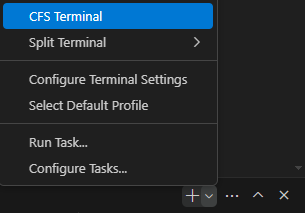
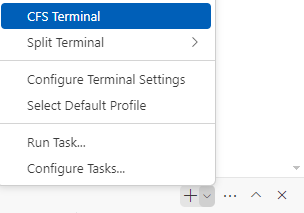
In the terminal panel, click the dropdown arrow next to the + icon in the top right corner.
-
Choose CFS Terminal from the list.
-
Run
cfsutilin the terminal to confirm it's working correctly.
Clear the terminal
Click on the Views and More Actions... menu (...) in the top right corner of the terminal window and select Clear Terminal.
Copy and Paste in the terminal
To copy text from the terminal, select the text, and right-clicking on the selected text. Keyboard shortcut: CONTROL+C (COMMAND+C on Mac).
To paste text into the terminal, right-click in the desired location, or press Ctrl+V on Windows, Ctrl+Shift+V on Linux, or Command+V on macOS.
Next steps
See Zephyr RTOS projects for examples of using the CFS Terminal with west build commands.