Evaluation Studio Setup Guide
By the end of this page you will have Evaluation Studio installed on a Windows PC, with the drivers your evaluation board needs, and the application launched and showing your hardware.
The installer is a single .exe that does everything in one pass: it
installs the .NET runtimes if your machine doesn't already have them,
installs Evaluation Studio, runs the driver installers you asked for, and
unpacks the plug-ins that pair with those drivers. Nothing else has to be
installed first.
Prerequisites
Before you start, ensure you meet the following requirements:
- Windows 10 or Windows 11, x64 or Arm64. Two installers are
published — the file name ends in
_x64.exeor_arm64.exe. Pick the one matching your machine (Settings → System → About → System type). macOS and Linux installers are not published yet. - Administrator rights on the PC. The installer writes to
C:\Program Files, registers the uninstaller, and installs USB drivers, so Windows raises a UAC prompt at launch. Without admin rights it cannot proceed. - Roughly 1 GB of free disk space on the install drive. This covers the application, the .NET runtimes, drivers, and the bundled plug-ins with headroom for the plug-ins you add later.
- A network connection, for anything beyond the bundled plug-ins.
Evaluation Studio downloads board support from
https://nuget.cloudsmith.io/adi/eval-studio/v3/index.jsonon demand and checksapi.cloudsmith.iofor application updates. Installation itself works offline — the installer carries everything it needs. - Your evaluation board unplugged, if it needs one of the drivers below. Connect it after installation so Windows binds the new driver on first sight of the board.
Get Evaluation Studio
Download the installer
Every Evaluation Studio release is published to the adi/eval-studio repository on
Cloudsmith: browse the packages.
Each release provides Evaluation Studio <version> Installer_x64.exe and the _arm64
twin. The installers for the current release carry the newest tag.
Run the installer
-
Double-click
Evaluation Studio <version> Installer_x64.exeand accept the UAC prompt. The wizard opens on Welcome to the Evaluation Studio Installer. Click Next.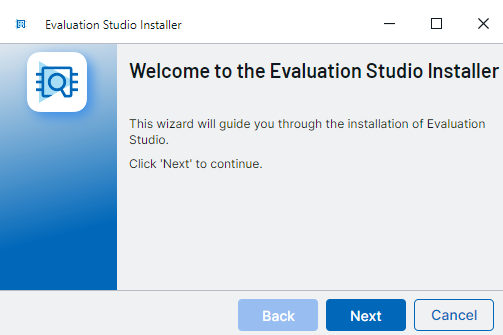
Each page carries Back, Next, and Cancel at the bottom right. Cancel is available until the installation itself begins.
-
Choose drivers. On Choose Drivers, leave Install the Default Drivers selected to install all of them — this is the right choice unless you know you don't want a driver on this machine.
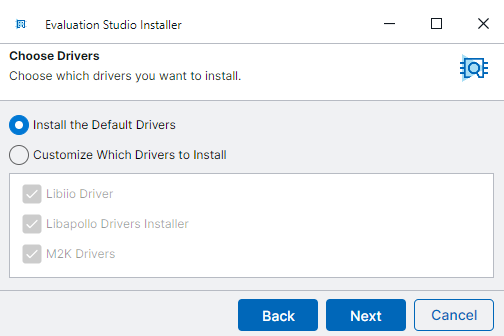
To be selective, pick Customize Which Drivers to Install and untick what you don't need:
Driver Needed for Libiio Driver IIO-based hardware — the large family of ADI boards driven over libiio, including ADALM2000/PlutoSDR-class devices Libapollo Drivers Installer Boards that connect through an Apollo dongle M2K Drivers ADALM2000 and PlutoSDR USB attachment Warning
Two bundled plug-ins are tied to these drivers: Hardware.IIO is installed only if the Libiio driver installs successfully, and Hardware.Apollo only if the Libapollo driver does. Skip a driver and you skip its plug-in — the boards it supports won't be recognised until you install both. The Block Diagram Viewer plug-in is installed either way.
Click Next.
-
Accept the licence. Read the agreement on License Agreement and click I Agree. You cannot continue without accepting it.
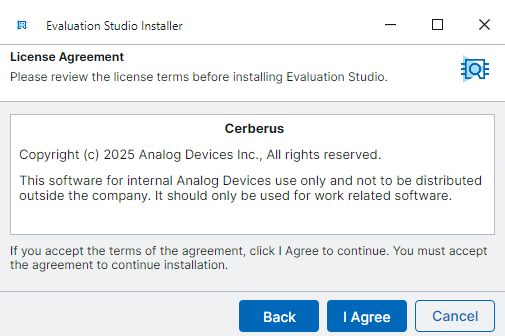
If a bundled plug-in ships its own licence, an extra page appears for each one immediately after this. Declining a plug-in's licence skips only that plug-in; the rest of the installation continues.
-
Choose install locations. Install Locations offers two folders, each with a Browse... button:
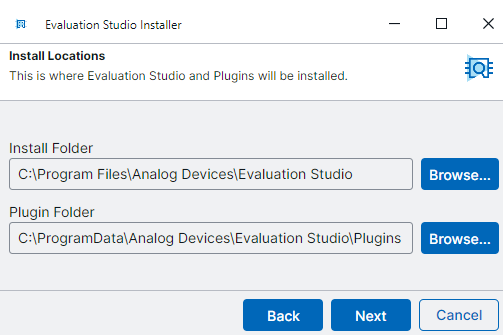
Field Default What lands there Install Folder C:\Program Files\Analog Devices\Evaluation StudioThe application and its uninstaller Plugin Folder C:\ProgramData\Analog Devices\Evaluation Studio\PluginsPlug-in packages, including every one you install later The defaults suit almost everyone. Change the Plugin Folder if you keep large plug-in sets off the system drive — the path you choose is written into Evaluation Studio's settings, so the application and the Plug-in Manager both use it from first launch.
Click Next to begin installing.
-
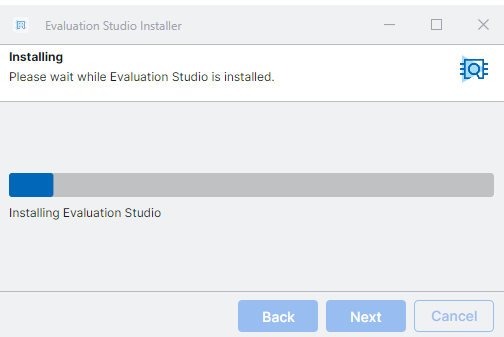
Wait for the installation to finish. The Installing page shows one progress step per component, naming each as it runs, in this order:
- LibIIO — LibIIO v1.0 is unpacked and installed
- Libapollo — Installation wizard to install Libapollo driver
- PlutoSDR-M2k-USB-Win Drivers — Install driver for interfacing with PlutoSDR devices
- .NET Desktop Runtime and ASP.NET Core Runtime — only if
version 10 of each isn't already present. The installer checks with
dotnet --list-runtimesand skips anything you already have. - Continue to Evaluation Studio itself.
- Installing Plugins — the bundled plug-ins unpacked into your plug-in folder.
Note
The driver installers are separate wizards and run with their own windows — they cannot be silenced. Expect one to appear per driver, possibly starting with a language picker and a licence page of its own. If one doesn't come to the front, check the taskbar: the installation waits for it.
The whole run usually takes a couple of minutes. Back, Next, and Cancel are disabled while it works.
-
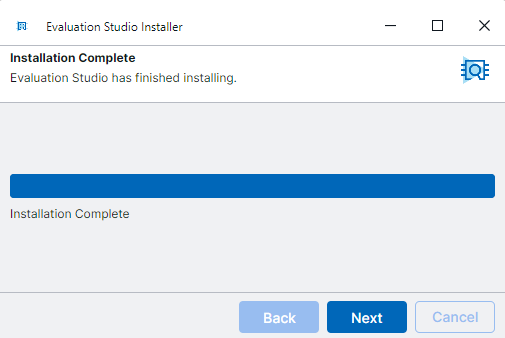
Finish. When the page reads Installation Complete, click Next, then Finish on the thank-you page. The installer closes and cleans up its temporary files.
If a .NET runtime asked for a restart, restart Windows before launching the application.
-
Launch Evaluation Studio. Open the Start menu and search for Evaluation Studio, or find it under Analog Devices → Evaluation Studio. The first launch is the slow one — allow up to a minute while the application creates its profile and scans plug-ins.
-
Answer the privacy prompt. On first run the application asks whether to share anonymous diagnostics. Nothing is sent unless you choose Share anonymous data, and you can change your answer later under Settings → Environment.
-
Connect your board. Plug it in. Windows binds the driver installed in step 5, and the board appears on the Home screen under Available Hardware. Click Open — any plug-ins the board needs and doesn't have are downloaded and installed for you before its views open. See Plug-in Management.
Verify
Work down this list; each item confirms a different part of the install landed.
-
The application starts. Evaluation Studio opens on the Home screen showing Available Hardware and Explore without Hardware. With no board connected the first section reads No Hardware Detected — that is correct, not a failure.
-
The version is what you installed. Click About at the bottom of the left rail. The version shown matches the installer's file name.
- The plug-in folder was set. Open Settings (the gear at the bottom of the left rail) → Plug-ins. Plug-in Install Path is the folder you chose in step 4, and the evaluation-studio repository shows as connected — proof the plug-in feed is reachable from this machine.
- The bundled plug-ins are present. Click Plug-Ins in the left rail and open the Installed tab. Block Diagram Viewer is listed, plus the IIO and Apollo hardware plug-ins for whichever of those two drivers you installed.
- Your board is recognised. With the board connected, it appears as a card under Available Hardware on the Home screen.
Where the installation put things
| Path | Contents |
|---|---|
C:\Program Files\Analog Devices\Evaluation Studio |
The application, its uninstaller, and userSettings.Default.json |
C:\ProgramData\Analog Devices\Evaluation Studio\Plugins |
Plug-in packages (or the folder you chose) |
%LOCALAPPDATA%\Analog Devices\Evaluation Studio |
Your profile: UserSettings\userSettings.json, Logs, workspaces, recordings, exported data |
%LOCALAPPDATA%\Analog Devices\Evaluation Studio\installer_logfile.txt |
The installer's own log — the first place to look if a step failed |
The installer also registers the .evalzip extension, so double-clicking
a plug-in bundle imports it into Evaluation Studio. Uninstalling removes
the association.
Uninstall or reinstall
To remove Evaluation Studio, use Analog Devices → Uninstall Evaluation Studio in the Start menu, or Evaluation Studio in Settings → Apps → Installed apps. Close the application first — the uninstaller refuses to run while it is open, and offers you Retry once you've closed it.
The uninstaller always removes the program files. Three things are optional, each with its own tickbox:
| Option | Effect |
|---|---|
| Drivers | Offers to run each driver's own uninstaller in turn. Leave off if other software on the PC uses libiio or the Apollo dongle. |
| Plugins | Deletes the plug-in folder recorded in your settings. |
| User Settings | Deletes %LOCALAPPDATA%\Analog Devices\Evaluation Studio — your settings, logs, workspaces, and recordings. |
To reinstall or move to a newer version, run the newer installer over the top; there is no need to uninstall first. Your profile and plug-ins are left alone. Once installed, Evaluation Studio can also fetch its own updates — see Update Evaluation Studio.
Troubleshooting
| Symptom | Cause | Fix |
|---|---|---|
| Nothing happens when you run the installer, or it exits immediately | The UAC prompt was declined, or admin rights are unavailable on this account | Right-click the installer → Run as administrator and accept the prompt. Ask your IT administrator if the account cannot elevate. |
| There were errors during the installation process with an error code | One component's installer failed | The named component tells you which. Open %LOCALAPPDATA%\Analog Devices\Evaluation Studio\installer_logfile.txt for the detail, then re-run the installer. |
| A driver wizard never appeared and the progress bar looks stuck | The driver installer opened behind the wizard | Check the taskbar and bring it to the front — installation continues once it finishes. |
| Windows asks to restart after installation | A .NET runtime installer returned reboot required (exit code 3010, treated as success) | Restart before launching Evaluation Studio. |
| The app starts, but your board never appears under Available Hardware | Its driver was skipped, so the matching plug-in wasn't installed either | Re-run the installer and select the driver, or install the plug-in yourself from Plug-in Management. Also try a different USB port and cable, and check Device Manager for a warning triangle. |
| The Browse tab of the Plug-in Manager is empty | The plug-in feed is unreachable — commonly a corporate proxy or firewall | Confirm https://nuget.cloudsmith.io/adi/eval-studio/v3/index.json is reachable from this machine, then check the feed is enabled under Repositories. |
| First launch hangs on the splash screen | A slow cold start, or a genuinely stalled startup | The application gives itself 90 seconds before showing an error rather than hanging. If it recurs, check the log folder and report it. |
| Startup fails with a settings error naming your data folder | userSettings.json is damaged — the application refuses to guess |
Fix or delete %LOCALAPPDATA%\Analog Devices\Evaluation Studio\UserSettings\userSettings.json; a missing file is recreated with defaults. |
| The uninstaller says to close Evaluation Studio, but it is closed | A process is still running | Close every window, and end Evaluation Studio.exe in Task Manager if it lingers, then click Retry. |
Related
- Quickstart — open your first board and capture data
- Plug-in Management — install support for your board
- Settings — where settings live, and the launch options that override them
- Update Evaluation Studio — moving to a newer version
- Logs — reading the application log when something misbehaves