Plug-in Management
Support for each evaluation board — its views, capture pipeline, and analysis tools — ships as a plug-in that Evaluation Studio downloads on demand. Most of the time you don't manage plug-ins at all: connect a board and the application fetches what it needs. The Plug-in Manager is there for everything else — browsing what's available, updating, uninstalling, and working offline.
The automatic path: connect a board
When Evaluation Studio detects a connected board, it appears as a card under Available Hardware on the Home screen. Click Open — if the board's plug-ins aren't installed yet, they are downloaded and installed for you, dependencies included, before the board's views open.
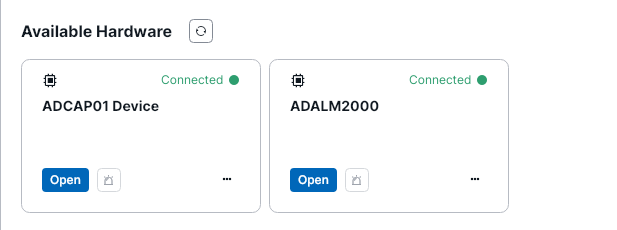
The rest of this page covers the manual path: the Plug-in Manager, opened from Plug-Ins in the left rail.
Find and install a plug-in
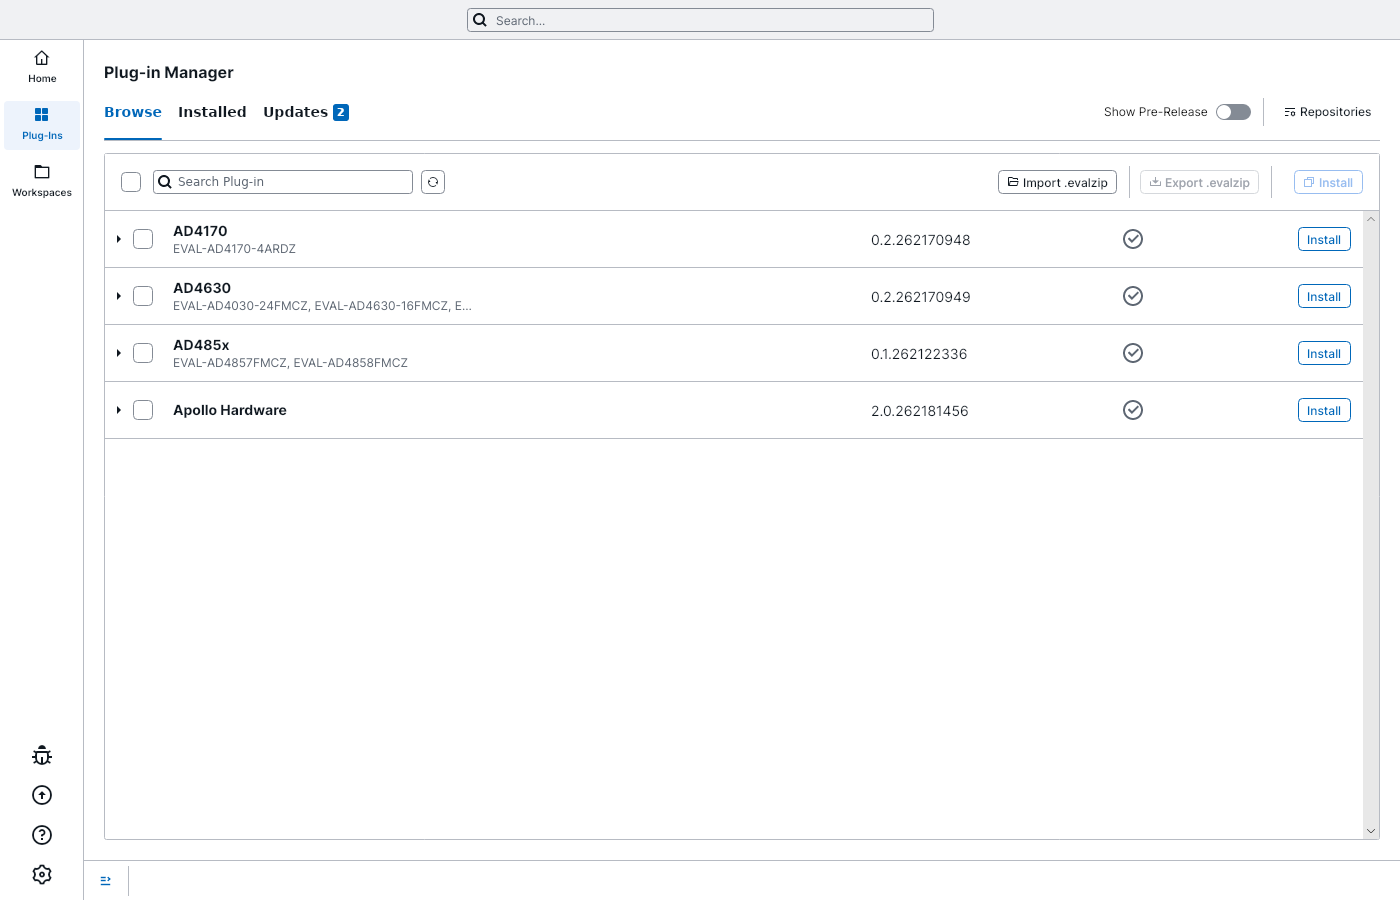
The Plug-in Manager. Browse lists what's available to install, Installed what you have, and Updates — with a count badge — what has a newer version.
- Click Plug-Ins in the left rail. The manager opens on the Browse tab.
-
Type your part number or evaluation-board name into the search box. Search matches plug-in names, descriptions, and supported board IDs — so searching for the board finds the plug-in even when the names differ:

-
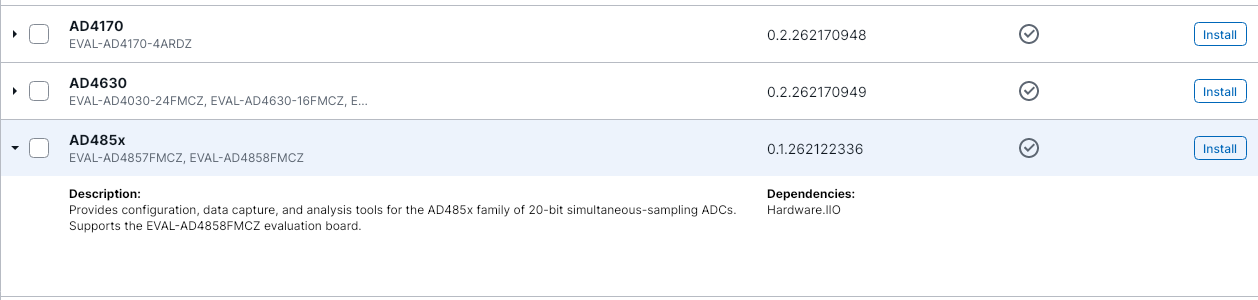
Click the row's ▸ chevron to check the description before committing:
-
Click Install. The row shows its progress, and any plug-ins yours depends on are fetched in the same operation:
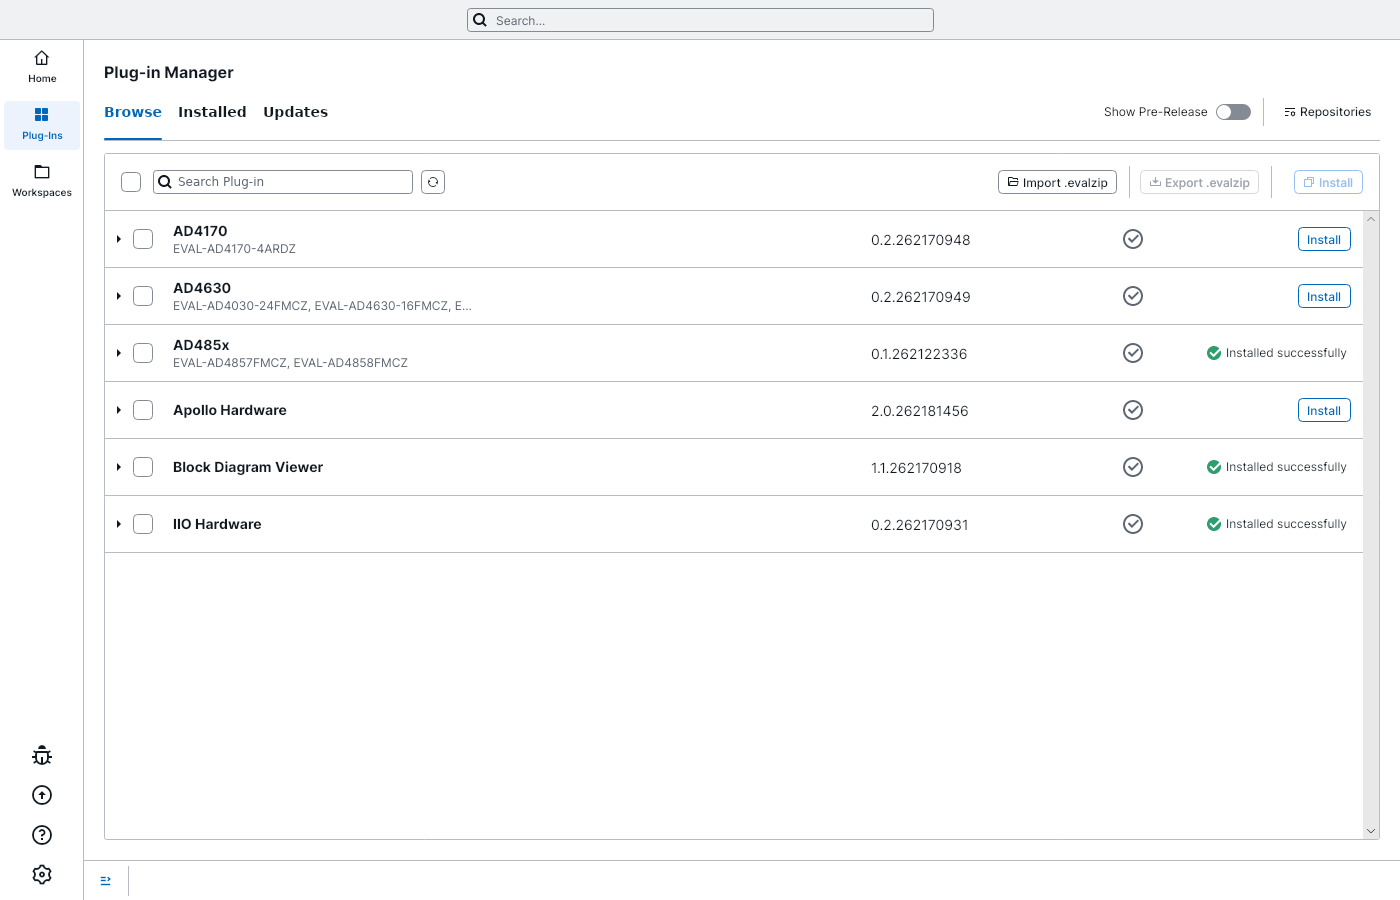
One click, three installs: AD485x plus the two plug-ins it depends on.
Tip
To install several plug-ins in one go, tick their checkboxes and use the Install button in the toolbar. A Stop button appears while the operation runs, in case you change your mind mid-download.
Note
Some plug-ins ship with a license agreement. When one does, an Accept/Decline dialog appears before the install proceeds — declining cancels that plug-in's install.
Keep plug-ins up to date
When an installed plug-in has a newer version in the repository, the Updates tab shows a count badge. Each row shows the jump you'd be making; update rows one at a time, or tick several and use the toolbar's Update button.
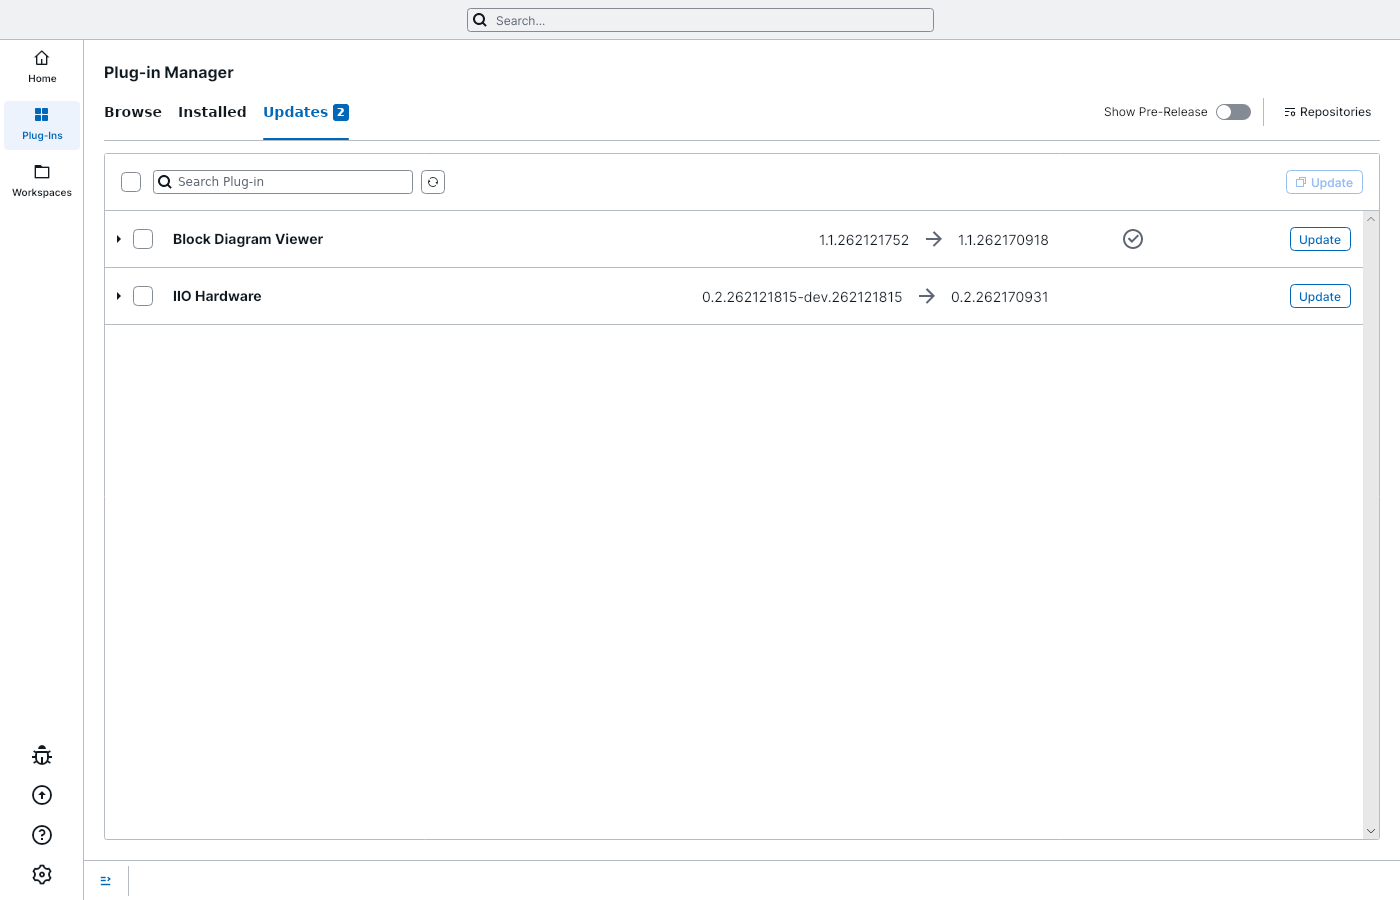
Uninstall a plug-in
On the Installed tab, click a row's Uninstall button. If other installed plug-ins depend on the one you're removing, Evaluation Studio warns you first — confirming removes the whole set, since the dependents can't work without it.
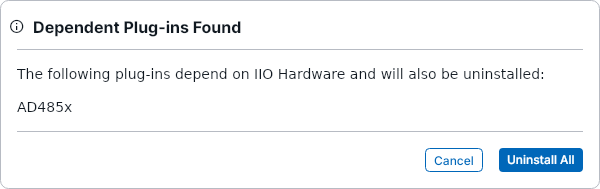
Warning
When nothing depends on the plug-in, clicking Uninstall acts immediately — there is no confirmation step.
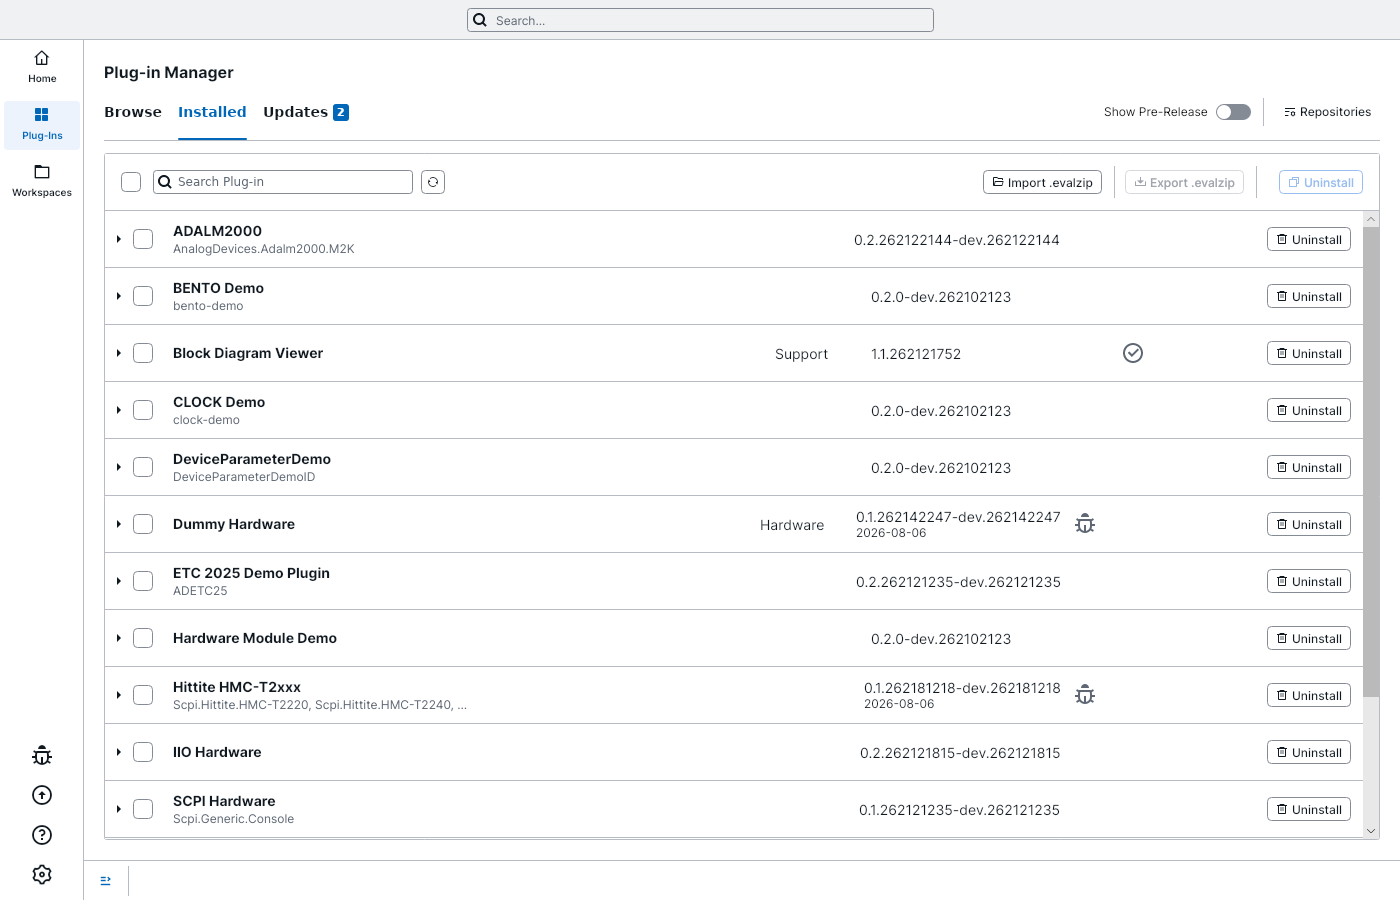
The Installed tab. Rows with the bug icon are unpackaged debug plug-ins loaded from a developer folder — you'll only see those if you build plug-ins yourself.
Where plug-ins come from
Plug-ins are fetched from one or more repositories — package feeds hosted by ADI. The Repositories button lets you toggle which feeds the Browse tab draws from; the list refreshes when you apply.
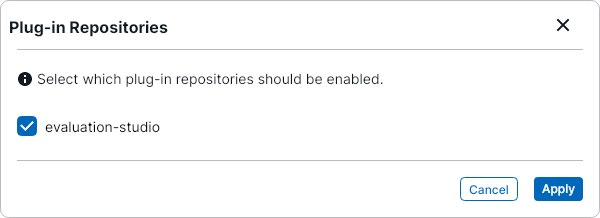
Two related controls live elsewhere:
- The Show Pre-Release toggle (top right of the manager) also offers versions that haven't had a stable release yet. Leave it off unless you're testing.
- Adding a repository, changing the install folder, and loading debug plug-ins are configured in Settings → Plug-ins.
Working offline
The Import .evalzip and Export .evalzip toolbar buttons move plug-ins as a single file instead of over the network — export bundles the plug-ins you tick plus their dependencies, and import installs a bundle on a machine with no repository access. A dedicated page on offline installation is planned; until then, the buttons are self-explanatory for simple cases.
If something goes wrong
| Symptom | Likely cause | What to do |
|---|---|---|
| Browse tab is empty | No repository reachable, or all feeds disabled | Check your network, then Repositories — at least one feed must be enabled. The refresh button next to the search box re-scans. |
| A plug-in shows Failed | Download or installation error | The application log (bottom panel) has the details. The status clears itself after a few seconds; try again. |
| Install button does nothing | Another plug-in operation is still running | Only one install/uninstall/update runs at a time — wait for it to finish or press Stop. |